A "weeping" sprinkler valve is more than a minor annoyance; in the relentless Arizona heat, it is a direct threat to your landscape's longevity and a steady drain on your budget. You might notice a persistent puddle near a valve box or a specific zone that never seems to turn off, leaving you to worry about the high cost of a full system replacement. It is a common source of anxiety for homeowners who simply want their property to remain healthy and vibrant. If you are trying to test if you have a bad valve for sprinkler system, the good news is that these failures are rarely a total mystery. Most issues boil down to a binary choice between a mechanical diaphragm failure or an electrical solenoid malfunction.
We understand that you want a definitive answer before you start cutting pipes or ordering parts. This guide provides the professional mechanical and electrical testing methods you need to diagnose the problem with precision. You'll learn how to identify the specific point of failure, whether it's mineral buildup in the valve body or a burnt-out coil. By following this logical progression, you can save money by replacing only the necessary components and ensure your irrigation system returns to its peak performance.
Key Takeaways
- Identify the specific signs of failure, such as "weeping" heads or persistent dry spots, to determine which zone requires professional attention.
- Discover the step-by-step process to test if you have a bad vale for sprinker system using professional manual bypass techniques.
- Master the use of a multimeter to check for solenoid continuity and resistance, helping you pinpoint electrical faults before considering a full replacement.
- Understand how regional environmental stressors, including mineral-heavy water and extreme soil heat, impact the longevity of your irrigation components.
- Determine when a simple internal rebuild is sufficient and when a compromised valve housing necessitates a complete unit replacement.
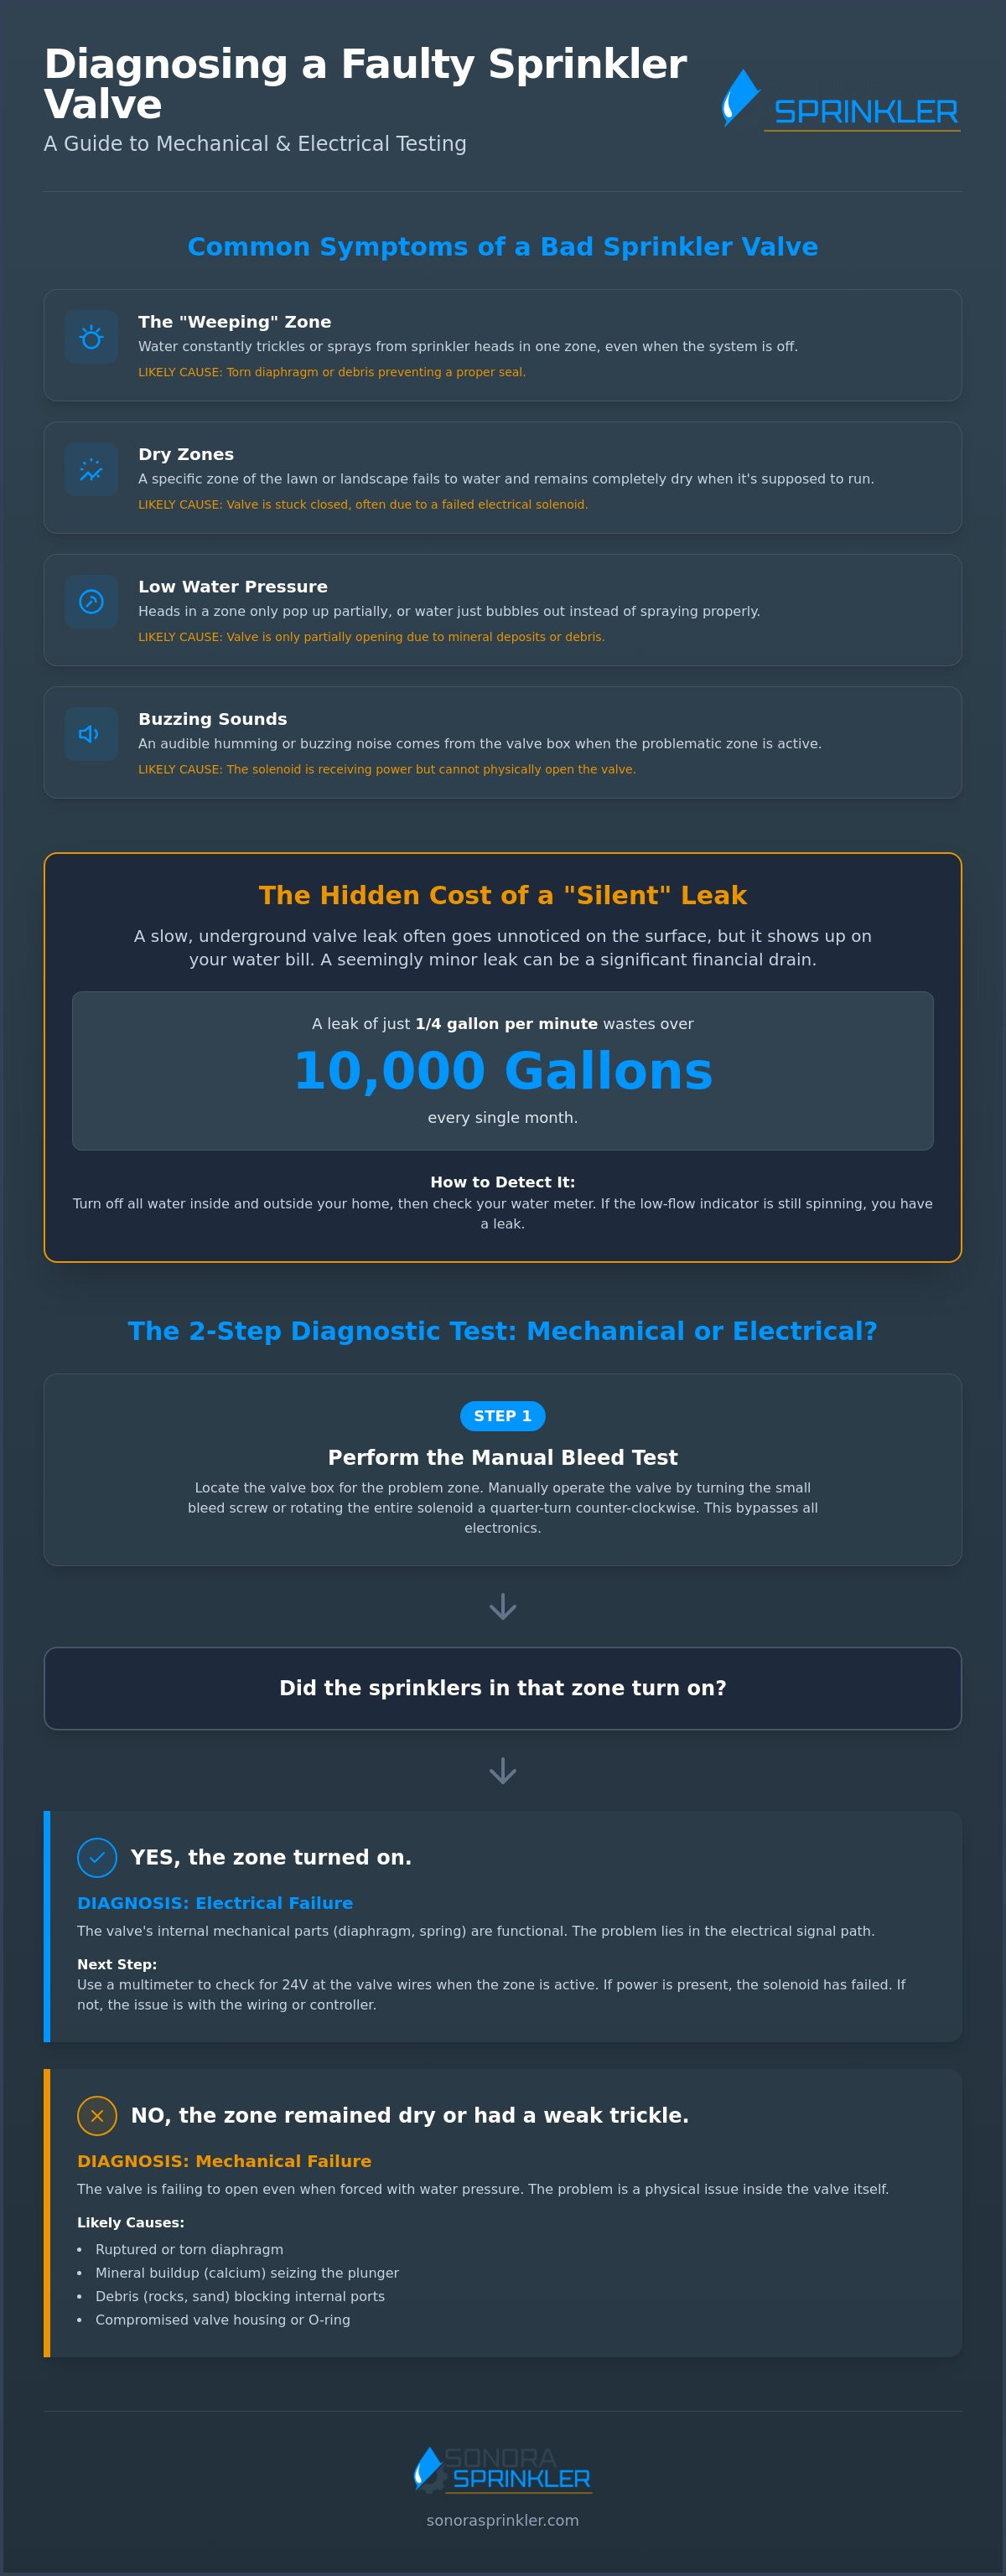
Common Symptoms of a Bad Sprinkler Valve
A sprinkler valve acts as the critical gatekeeper for your home's hydration. Understanding how sprinkler systems function is helpful, but diagnosing a specific failure requires looking for localized patterns rather than general system errors. To accurately test if you have a bad vale for sprinker system, you must first recognize the physical evidence left behind by a failing mechanical or electrical component.
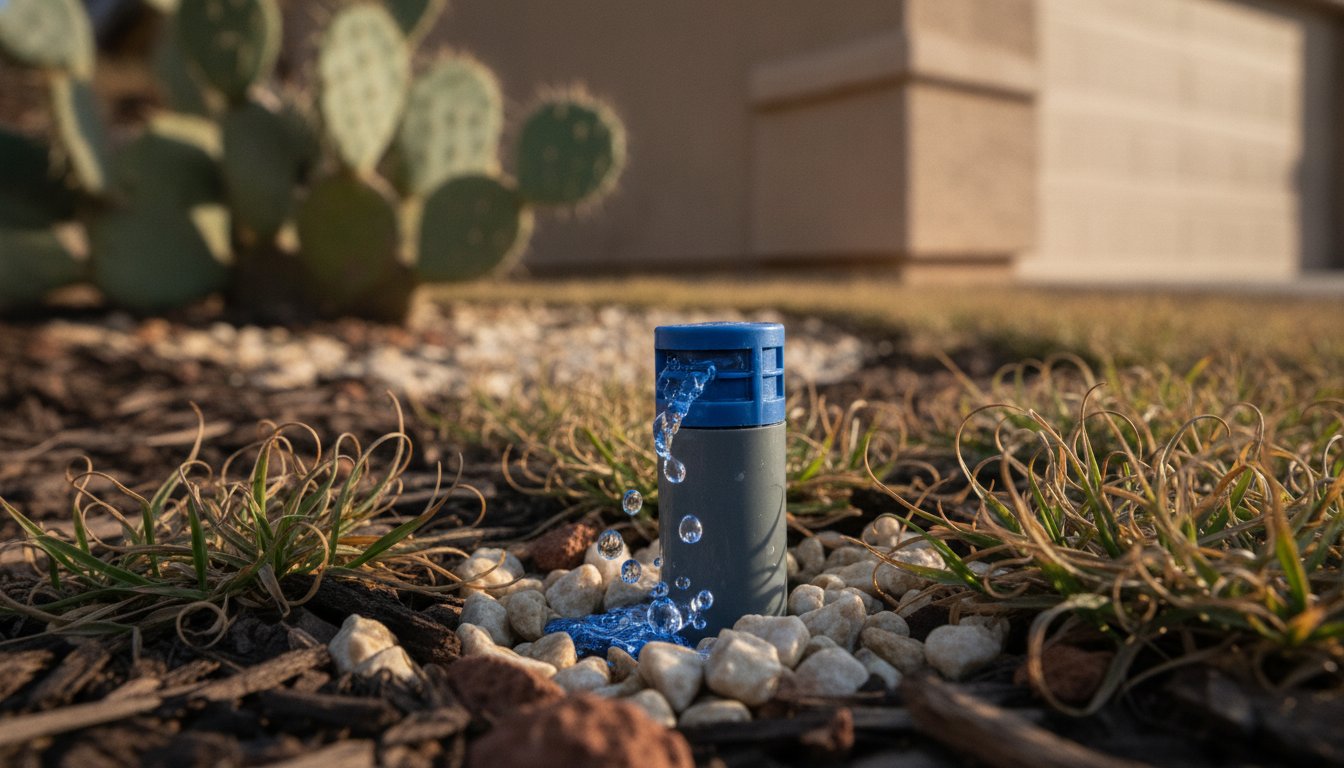
- The "Weeping" Zone: If you notice water constantly trickling from heads even when the system is off, the valve diaphragm likely has a tear or debris preventing a full seal.
- Dry Zones: When a specific area of the lawn or desert landscape refuses to turn on, the valve is likely stuck in the closed position, often due to a failed solenoid.
- Low Water Pressure: Zone heads only popping up halfway or barely bubbling suggests the valve is only partially opening. This is common when mineral deposits restrict internal movement.
- Buzzing Sounds: An audible hum coming from the valve box when a zone is active indicates the solenoid is receiving power but cannot physically lift the internal plunger.
- Surface Pooling: Water pooling around the valve box itself often points to a cracked housing or a failed O-ring. This symptom requires immediate Valve and Backflow Services to prevent soil erosion and potential foundation issues.
Distinguishing Between Valve and Controller Issues
It's vital to determine if the fault lies in the valve or the irrigation timer. If only one zone is failing while the others operate perfectly, the problem is localized to that specific valve. You can verify this by checking if the timer is sending a 24V signal to the zone wires using a multimeter. A "ghosting" zone, where multiple zones turn on at once or the system runs at odd hours, is usually a software glitch or a wiring short rather than a mechanical valve failure. Identifying the source early prevents unnecessary part replacements.
The High Water Bill Warning
Mechanical failures often hide underground before they become visible on the surface. A slow leak in a valve diaphragm can waste hundreds of gallons monthly without creating a massive puddle. You can use your water meter to detect these "silent" leaks by ensuring all household water is off and checking if the meter's low-flow indicator is still spinning. A seemingly minor leak of just 1/4 gallon per minute can add over 10,000 gallons to your monthly Surprise water bill, turning a small mechanical flaw into a significant financial burden. Regular monitoring of your utility statement is often the first step to test if you have a bad vale for sprinker system.
The Manual Test: How to Check for Mechanical Failure
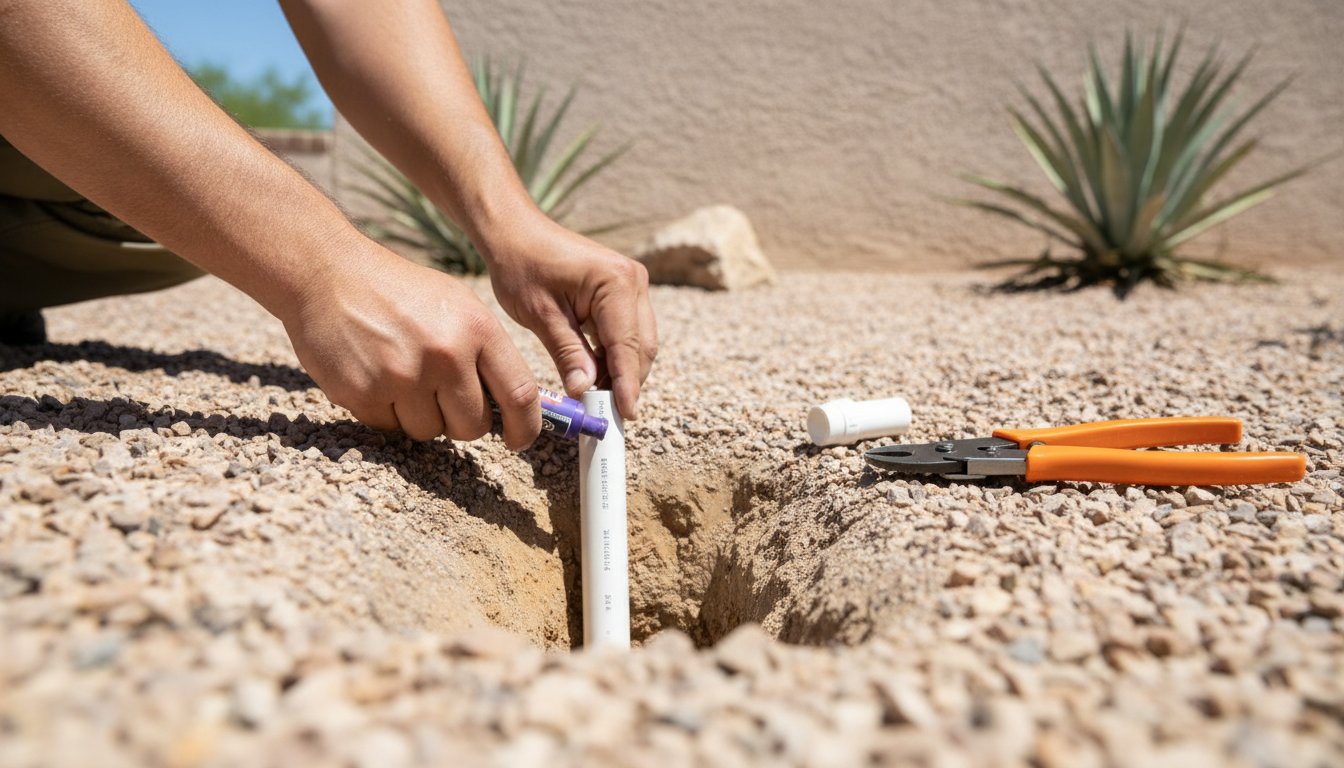
To begin the diagnostic process, you must move from the controller to the field. Locating your valve box is the first practical step to test if you have a bad vale for sprinker system. Once you have removed the lid and identified the valve corresponding to the problem zone, you can perform a manual bleed test. This procedure bypasses the electrical components and forces the valve to operate on purely hydraulic pressure.
Most professional-grade valves allow for manual operation by either turning a small bleed screw or rotating the solenoid itself a quarter-turn counter-clockwise. This action vents water from the top of the internal diaphragm, allowing the main line pressure to lift the rubber seal. The results of this test provide a clear diagnostic path. If the zone springs to life during this manual bypass, you have confirmed that the mechanical components are functional. In this scenario, the next logical step involves testing for voltage at the solenoid to find the electrical break. However, if the zone remains dry or only produces a weak trickle despite the manual bleed, the failure is mechanical; likely a physical blockage, a ruptured diaphragm, or a seized internal plunger.
Operating the Bleed Screw Safely
It is essential to distinguish between the small bleed screw and the larger flow control handle. The bleed screw is typically a small, plastic thumb-screw or a recessed screw located on the valve lid. When opening it, you should only turn the screw a half-turn. Opening it too far can cause the screw to "pop" out under pressure, making it difficult to re-seat while water is spraying. If water begins to seep from the threads during the test, this is normal behavior for many valve models; simply tighten it back down once your observation is complete.
Testing the Flow Control Handle
Before concluding that a valve has failed, check the flow control handle, which is the largest dial on top of the valve. In some cases, the flow control may have been accidentally dialed down to the "off" position, preventing water from passing through even if the solenoid is working. In Arizona's desert environment, fine grit and calcium can settle under the flow control seat, preventing the internal spring from lifting the diaphragm. If the handle feels unusually tight or loose, it may indicate that the internal spring has lost tension or that mineral deposits have seized the mechanism. If you are unsure about the state of your components, it may be time to reach out for a professional diagnostic to test if you have a bad vale for sprinker system before the summer heat intensifies.
The Electrical Test: Diagnosing Solenoid and Wiring Issues
The solenoid is an electromagnetic coil that acts as the primary gatekeeper for your water flow. When your irrigation controller sends a 24-volt signal, the solenoid creates a magnetic field that lifts an internal metal plunger, allowing the valve to open. If your manual bypass test from the previous section was successful, the next logical step to test if you have a bad vale for sprinker system is to evaluate the electrical integrity of this component and its connected wiring.
You can begin with a simple "Click" test. Have someone activate the specific zone at the controller while you stand near the open valve box. You should hear a distinct mechanical click as the plunger engages. If you hear nothing, or if you hear a faint buzzing sound, the solenoid is likely failing to overcome internal friction or is not receiving sufficient power. Before reaching for tools, inspect the wire nuts inside the box for signs of corrosion or "nicked" insulation on the irrigation wiring. Arizona’s rocky soil often shifts over time, which can cause sharp stones to pierce wire jackets and create intermittent shorts.
How to Use a Multimeter on Your Sprinkler Valve
To move beyond guesswork, you need a multimeter to measure electrical resistance. Set the dial to the Ohm range, usually marked as 200 or 2k. Disconnect the solenoid from the field wires and touch the multimeter leads to the two solenoid wires. For most modern residential valves, the "Goldilocks" zone for resistance is between 20 and 60 Ohms. A reading in this range indicates the copper coil inside is healthy.
If your meter shows a reading below 20 Ohms, the solenoid has an internal short circuit and must be replaced. Conversely, an "Infinite" or "OL" (Open Line) reading tells you that the internal wiring has snapped or burned out completely. These specific data points are essential for troubleshooting sprinkler valves because they provide a binary answer: the part is either electrically sound or it is trash.
Identifying Solenoid vs. Field Wire Failure
It's important to differentiate between a localized solenoid failure and a break in the wires buried in your yard. Test the resistance at the valve first. If the solenoid tests fine at the box but the zone still won't fire from the timer, the issue lies in the field wire or the common wire. A "short" in the common wire often affects multiple zones simultaneously, while a single zone failure usually points to a dedicated hot wire break. For homes with complex layouts or older systems, professional wiring diagnostics are often necessary to trace the exact location of an underground fault without digging up the entire yard. This systematic approach ensures you don't replace a functional valve when the real culprit is a corroded connection several feet away.
Why Irrigation Valves Fail in Arizona Landscapes
Understanding the mechanical and electrical failure points is only half the battle. In the Southwest, the environment itself is often the primary antagonist. Homeowners often find it necessary to test if you have a bad vale for sprinker system after a particularly harsh monsoon season or a record-breaking summer. Our local soil and water conditions present challenges that standard irrigation components aren't always designed to handle indefinitely.
Desert monsoons bring more than just rain; they carry fine silt and abrasive sand that can infiltrate your valve box. This debris often finds its way into the small ports of the valve body, causing them to clog. When these ports are obstructed, the hydraulic balance required to move the diaphragm is lost, leading to a valve that either won't open or refuses to shut off. This is a common occurrence in areas with high dust exposure.
Local flora also plays a role in system longevity. The aggressive root systems of native trees like the Mesquite are known for their ability to seek out moisture with surprising force. These roots can grow around valve manifolds, eventually crushing PVC pipes or shifting the entire valve assembly, which leads to housing cracks and persistent leaks. This physical pressure can make it difficult to test if you have a bad vale for sprinker system without first clearing away significant growth.
Calcium and Hard Water Obstructions
Arizona is notorious for its hard water, which is rich in dissolved minerals. Many "weeping" valves aren't actually broken; they are simply unable to close because of grit. Mineral calcification occurs when dissolved solids in the water supply precipitate onto the valve's internal surfaces, creating a physical barrier that prevents the diaphragm from forming a watertight seal. Cleaning the diaphragm seat can sometimes restore function, but once the rubber is pitted by these deposits, a replacement is usually required.
UV and Heat Degradation
Extreme heat is perhaps the most consistent threat in Surprise and the surrounding areas. When soil temperatures exceed 115°F, plastic valve housings and the delicate wire insulation on solenoids begin to degrade. A properly fitted valve box cover is essential for temperature regulation, as it provides a necessary buffer against the sun's intensity. Without this protection, the plastic becomes brittle and prone to hairline fractures. You can find more details on protecting your system in our guide on irrigation repairs.
If your system is struggling against the elements, don't wait for a total failure; schedule a professional system evaluation today to ensure your landscape stays protected.
When to Repair vs. Replace Your Sprinkler Valve
Once you have used the manual and electrical methods to test if you have a bad vale for sprinker system, you face a choice: repair the existing unit or replace it entirely. This decision often hinges on the specific component that failed. If your multimeter confirmed a dead solenoid, a simple component swap is far more efficient than a full excavation. Replacing a single solenoid is a minor investment in parts compared to the significant labor and material costs required for a complete valve replacement. However, if the valve housing itself is compromised, the "cut and replace" rule applies.
Cracked plastic housings or stripped threads on the intake side cannot be reliably patched. In these cases, a full replacement is the only way to ensure the long-term health of your property. For homeowners in the Phoenix valley, this is also an opportunity to improve system efficiency. Arizona state law, as of May 21 2026, requires that failed valves be replaced with water-saving models that meet specific administrative codes. Upgrading to these modern units helps manage desert landscapes more effectively while reducing the risk of high water bills. Utilizing professional valve and backflow services is especially critical for high-pressure systems where a minor installation error can lead to a catastrophic pipe burst.
DIY Repair: Replacing the Diaphragm
If the housing is sound but the valve is "weeping," you can often "gut" the valve to restore it. This involves removing the bonnet screws and replacing the internal rubber diaphragm and seat without cutting any PVC. It's vital to match the exact brand and model, whether you're working with Rain Bird, Hunter, or Irritrol, as these internal parts are not interchangeable. Always replace the internal spring at the same time you replace the diaphragm. A worn spring might lack the tension required to push the new rubber seal down, leading to continued leaks even with a new diaphragm.
When to Call a Professional in Surprise or Peoria
While a diaphragm swap is a manageable task, full valve replacements carry significant risks for the inexperienced. The valve manifold is often a tight cluster of pipes; one wrong cut or a cross-threaded fitting can necessitate a total manifold rebuild. If you encounter complex wiring issues that a standard multimeter can't resolve, or if the valve is buried in a difficult location with heavy root intrusion, professional intervention is the safest route. If you've completed your steps to test if you have a bad vale for sprinker system and find the repair beyond your comfort level, contact Sonora Sprinkler Inc. today for a reliable, professional diagnostic and repair.
Restoring Your Irrigation System's Precision
Diagnosing a faulty valve doesn't have to be a matter of guesswork. By systematically applying manual bypass tests and electrical resistance checks, you can determine whether a simple diaphragm cleaning or a full solenoid replacement is the correct remedy. It's important to remember that Arizona's unique environmental stressors, from hard water calcification to extreme soil temperatures, play a significant role in how these components age over time. To accurately test if you have a bad vale for sprinker system, you must evaluate both the mechanical seal and the electrical integrity of the wiring.
If your diagnostics reveal a complex underground break or a seized manifold, seeking professional expertise ensures the long-term health of your landscape. Sonora Sprinkler Inc. has been family-owned and operated since 1999, providing specialized knowledge in Arizona desert irrigation systems. We offer expert wiring and valve diagnostics for homeowners in Surprise and Peoria, focusing on durable results that stand up to our regional climate. Schedule a Professional Valve Diagnostic with Sonora Sprinkler Inc. today to protect your property. With the right approach, you can maintain a vibrant, water-efficient landscape throughout the year.
Frequently Asked Questions
How do I know if my sprinkler solenoid is bad?
A failing solenoid is typically identified by a lack of an audible "click" when the zone is activated or by using a multimeter to check electrical resistance. If your meter shows an "OL" reading or a number outside the 20 to 60 Ohm range, the internal coil has likely failed. You might also notice a faint buzzing sound, which suggests the solenoid is receiving power but cannot physically lift the internal plunger to allow water flow.
Can a bad sprinkler valve cause low water pressure?
Yes, a malfunctioning valve can significantly restrict water pressure if the internal diaphragm fails to open completely. This often happens when mineral deposits or desert silt accumulate inside the valve body, preventing the hydraulic mechanism from lifting the seal. If your sprinkler heads are only popping up halfway or barely bubbling, it's a strong indicator that the valve is obstructed or the internal spring has lost its necessary tension.
What does a humming sprinkler valve mean?
A humming or buzzing sound indicates that the solenoid is receiving an electrical signal from the controller but is mechanically unable to move the plunger. This is frequently caused by a build-up of calcium or grit that has seized the plunger in place. It can also suggest that the electrical current is insufficient to overcome the internal friction, often pointing to a failing solenoid that requires immediate professional attention to prevent a total zone failure.
How much does it cost for a professional to replace a sprinkler valve?
Professional service fees for valve replacement depend on several factors, including the number of valves in the manifold and the depth of the excavation required. Since Arizona regulations require specific water-saving replacement models, a professional ensures the new hardware meets current administrative codes. The total investment typically accounts for the master craftsman's time, specialized diagnostic tools, and high-durability components designed for desert longevity. It is best to request a site-specific quote for accuracy.
Why does one sprinkler zone stay on when the system is off?
This issue, known as "weeping," occurs when the valve cannot form a watertight seal, allowing main line pressure to leak through the heads. It's usually caused by a torn diaphragm or debris trapped on the valve seat. Even a small piece of Arizona grit can prevent the valve from closing fully. Over time, this constant flow can lead to significant water waste and localized flooding, making it essential to address the mechanical failure quickly.
Is it better to repair a sprinkler valve or replace it?
Repair is the preferred route if the valve housing is intact and the problem is limited to a faulty solenoid or a worn diaphragm. However, if the plastic body is cracked or mineral buildup has pitted the internal seat, a full replacement is the only reliable fix. It's often helpful to test if you have a bad vale for sprinker system using a manual bypass to see if the mechanical structure still functions before committing to a total unit swap.
Can I replace a sprinkler valve solenoid without turning off the water?
You can technically replace the solenoid without shutting off the main water supply because the solenoid sits on top of the sealed valve chamber. However, you must be extremely careful not to loosen the valve bonnet screws or the manual bleed screw during the process. If the valve body is opened under pressure, it will result in an immediate, high-pressure geyser. For most homeowners, turning off the water at the backflow preventer is the safer approach.
How long do irrigation valves typically last in Arizona?
In the harsh Arizona environment, high-quality irrigation valves typically last between 10 and 15 years. The intense summer heat and mineral-heavy water supply are particularly hard on rubber and plastic components. You may find that diaphragms need replacement every 5 to 7 years to maintain a perfect seal. Regular maintenance and ensuring your valve boxes have secure covers can help extend the lifespan of these critical system components by protecting them from UV degradation.